The default mail client for iPhones allows for email signatures. The problem is that it is very basic and Apple has made it quite confusing to keep the formatting that you want in your email signature. You literally have to shake your phone at one point in the process, which is unconventional and confusing to many people. We'll go over the steps required so that you can copy your designed signature into Mail for iOS.
If you want to make a well designed email signature, we would recommend using a tool like our email signature generator. This tool allows you to choose from a set of starting templates and customize them by changing fonts, colors, images and adding additional fields. It creates the HTML code for you so you don't even have to worry about it!
Here is a step by step process of how to add your email signature for your iPhone:
-
It is not recommended to use mobile safari to copy email signatures!
So don't visit a website on your phone to grab your email signature. Instead start on your computer with step 2.
Unfortunately when you "Copy" something out of your web browser on your iPhone, it doesn't copy exactly what is there. It puts it through a filter and removes most of the formatting that is found in the HTML code. It only keeps the most basic elements.

-
Instead, if you are using Signature.email and have a paid plan, use the Send Via Email button to send the signature to your mobile inbox.
Or otherwise, use your desktop email client to send your signature to yourself via email.

-
Once that is done, open your Mail app and open the email. Press and hold on some text to select it, then expand your selection to the entire signature and choose Copy.

-
Find your Settings and tap on it.

-
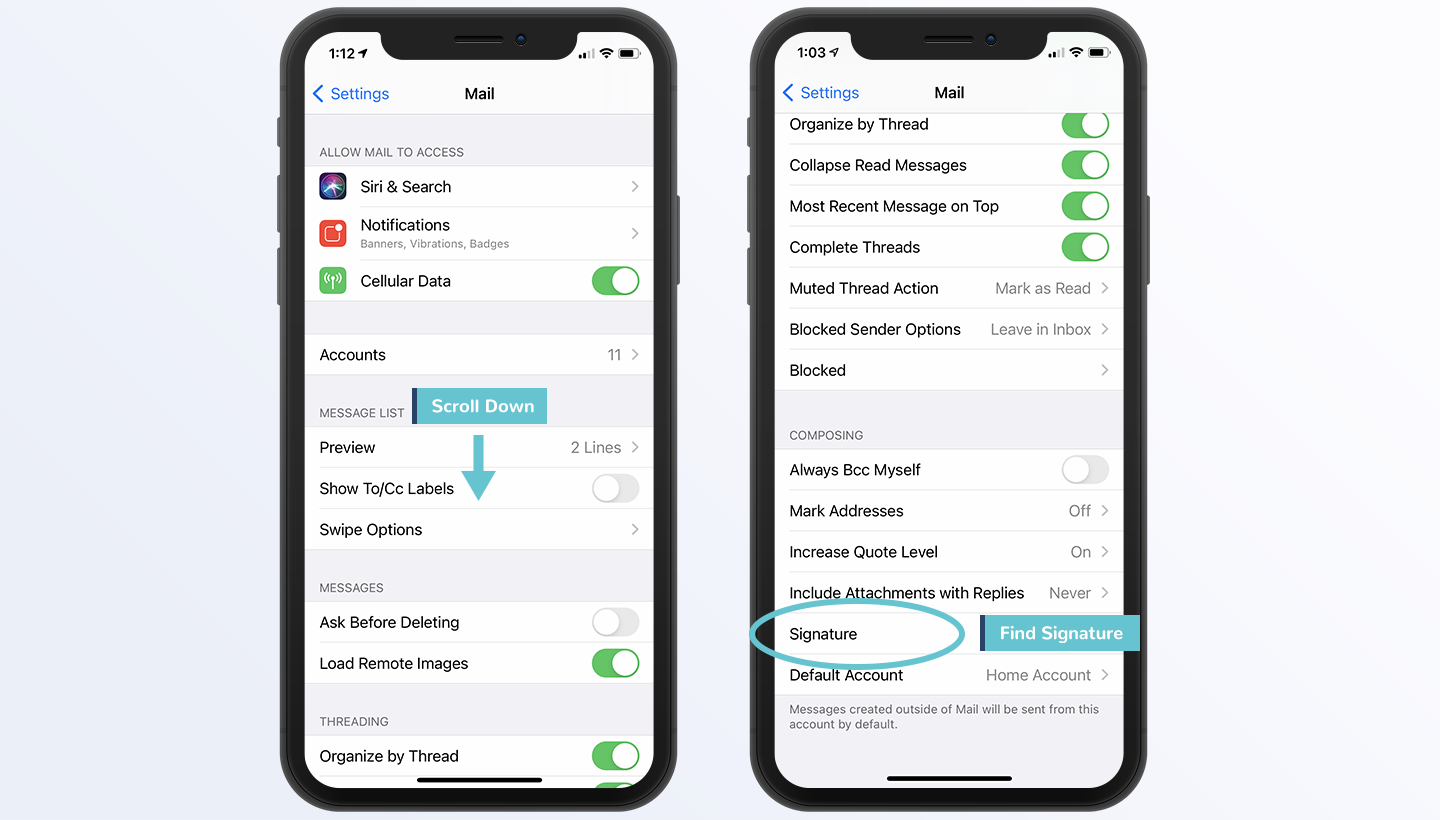
In Settings scroll down until you see Mail and tap on it.

-
In the mail settings scroll to the bottom and find Signature near the bottom.
-
Select your preference of whether you want a single signature for All Accounts, or Per Account. Then delete any signature that is already there.

-
Press and hold the empty Signature field to bring up the selection tool. Then choose Paste.

-
By default all of your fancy formatting will be removed! Oh no! Shake your phone (no, not kidding here), this will bring up a dialog box. Choose Undo. This will bring back your formatting on your signature!
(If no dialog box comes up after you try shaking it, know that it is possible that you turned the Shake to Undo functionality off on your phone. To re-enable it go to Settings App > Accessibility > Touch > Shake to Undo)

-
Your signature is saved automatically. You can back out of all of the menus you are in. Now when you compose a new email on your phone you will see your new signature!

That's it, you are finished! You are now a pro at managing signatures on the iPhone (something to impress your friends with). If you have additional questions please don’t hesitate to reach out and let me know! You may also want to check out my beginners guide on creating email signatures.
